
类型:人工智能
简介:基于AI的绘画生成工具,主要用于根据文本描述生成详细图像。
本文将详细介绍如何通过阿里云 AMD CPU 云服务器(g8a 实例)+ 龙蜥系统容器镜像,基于 Stable Diffusion 模型快速搭建个人版文生图 AI 绘图服务。
一、创建阿里云ECS云服务器实例
访问阿里云官网:点击直达
进入阿里云 ECS 实例购买创建页面,按以下核心参数完成配置,按需设置。
关键配置项:
- 实例规格:Stable Diffusion 模型推理对算力、内存占用极高,为保障稳定,最低选择 ecs.g8a.16xlarge 规格(256GiB 内存);
- 操作系统镜像:选择 Alibaba Cloud Linux 3.2104 LTS 64位;
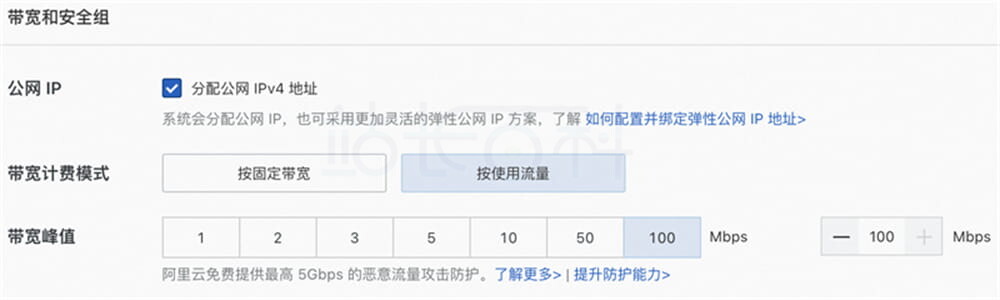
- 公网网络配置:勾选分配公网 IPv4 地址,带宽计费模式选择按使用流量,带宽峰值设置为100Mbps,加快模型、依赖包下载速度;
- 系统盘:模型文件体积庞大,建议系统盘容量设置为100GiB,避免存储空间不足。
安全组放行端口:在 ECS 实例安全组入方向添加放行规则,开放端口:22(远程连接)、443、7860(WebUI 绘图服务访问端口)。
获取实例公网 IP:实例创建完成后,在 ECS 控制台实例详情页,复制公网 IP 地址,后续用于访问 Stable Diffusion WebUI 绘图界面。

二、搭建Docker环境
1、远程连接阿里云ECS云服务器实例
通过阿里云 Workbench 工具登录 Linux 实例。
2、安装Docker环境
完成 Docker 安装。
3、创建 AMD 优化版 PyTorch 容器
龙蜥社区提供适配 Anolis OS、针对 AMD 处理器深度优化的 PyTorch 容器镜像,可直接用于部署 AI 环境,执行以下命令拉取镜像并创建容器:
# 拉取AMD优化PyTorch镜像
sudo docker pull registry.openanolis.cn/openanolis/pytorch-amd:1.13.1-23-zendnn4.1
# 后台创建并启动容器,映射本地用户目录,持久化项目文件
sudo docker run -d -it –name pytorch-amd –net host -v $HOME:/root registry.openanolis.cn/openanolis/pytorch-amd:1.13.1-23-zendnn4.1
三、部署Stable Diffusion绘图服务
重要提示:后续所有操作均需在容器环境内执行,若意外退出,执行下方命令重新进入;可通过cat /proc/1/cgroup | grep docker校验是否处于容器内,有输出即为容器环境。
sudo docker exec -it -w /root pytorch-amd /bin/
步骤 1:安装环境依赖工具
# 安装基础依赖软件
yum install -y git git-lfs wget tmux mesa-libGL gperftools-libs
# 启用Git LFS,用于下载大体积预训练模型
git lfs install
步骤 2:下载项目源码与预训练模型
模型下载耗时久、易因网络断开中断,使用tmux新建会话后台下载:
tmux
下载 Stable Diffusion WebUI 开源项目源码
git clone -b v1.5.2 https://github.com/AUTOMATIC1111/stable-diffusion-webui.git
下载项目所需依赖仓库源码
mkdir stable-diffusion-webui/repositories && cd $_
git clone https://github.com/Stability-AI/stablediffusion.git stable-diffusion-stability-ai
git clone https://github.com/Stability-AI/generative-models.git generative-models
git clone https://github.com/crowsonkb/k-diffusion.git k-diffusion
git clone https://github.com/sczhou/CodeFormer.git CodeFormer
git clone https://github.com/salesforce/BLIP.git BLIP
切换依赖仓库至指定稳定版本分支,保障绘图效果稳定
git -C stable-diffusion-stability-ai checkout cf1d67a6fd5ea1aa600c4df58e5b47da45f6bdbf
git -C generative-models checkout 5c10deee76adad0032b412294130090932317a87
git -C k-diffusion checkout c9fe758757e022f05ca5a53fa8fac28889e4f1cf
git -C CodeFormer checkout c5b4593074ba6214284d6acd5f1719b6c5d739af
git -C BLIP checkout 48211a1594f1321b00f14c9f7a5b4813144b2fb9
下载 SD 主模型与 CLIP 文本编码模型
# 下载Stable Diffusion v1.5基础模型
cd ~ && mkdir -p stable-diffusion-webui/models/Stable-diffusion
wget “https://www.modelscope.cn/models/AI-ModelScope/stable-diffusion-v1-5/resolve/master/v1-5-pruned-emaonly.safetensors” -O stable-diffusion-webui/models/Stable-diffusion/v1-5-pruned-emaonly.safetensors
# 下载CLIP ViT文本编码器模型
mkdir -p ~/stable-diffusion-webui/models/clip
git clone –depth=1 https://gitee.com/modelee/clip-vit-large-patch14.git ~/stable-diffusion-webui/models/clip/clip-vit-large-patch14
修改配置,调用本地 CLIP 模型(避免在线拉取失败)
sed -i “s?openai/clip-vit-large-patch14?${HOME}/stable-diffusion-webui/models/clip/clip-vit-large-patch14?g” ~/stable-diffusion-webui/repositories/stable-diffusion-stability-ai/ldm/modules/encoders/modules.py
步骤 3:配置 Python 环境
更换阿里云 pip 国内镜像源,加速依赖包安装
mkdir -p ~/.config/pip
cat > ~/.config/pip/pip.conf <<EOF
[global]
index-url=http://mirrors.cloud.aliyuncs.com/pypi/simple/
[install]
trusted-host=mirrors.cloud.aliyuncs.com
EOF
安装 Python 核心依赖库
pip install cython gfpgan open-clip-torch==2.8.0 httpx==0.24.1
pip install git+https://github.com/openai/CLIP.git@d50d76daa670286dd6cacf3bcd80b5e4823fc8e1
配置 ZenDNN 优化环境变量(适配 AMD 处理器)
cat > /etc/profile.d/env.sh <<EOF
export OMP_NUM_THREADS=\$(nproc –all)
export GOMP_CPU_AFFINITY=0-\$(( \$(nproc –all) – 1 ))
EOF
source /etc/profile
自动初始化 SD 环境
cd ~/stable-diffusion-webui
venv_dir=”-” ./webui.sh -f –skip-torch-cuda-test –exit
步骤 4:启动 WebUI 绘图服务并使用
启动 Stable Diffusion WebUI 服务
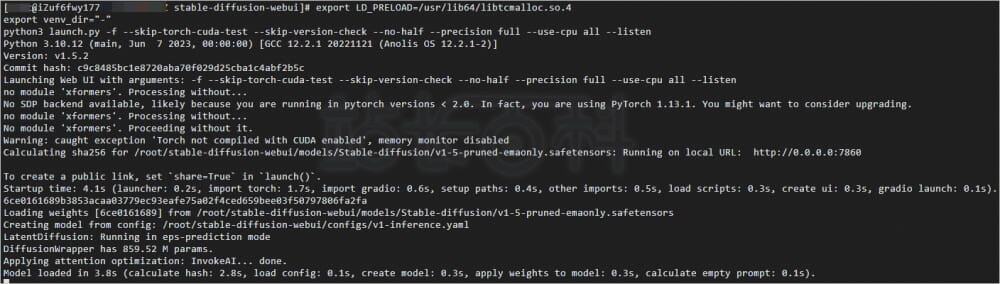
export LD_PRELOAD=/usr/lib64/libtcmalloc.so.4
export venv_dir=”-”
python3 launch.py -f –skip-torch-cuda-test –skip-version-check –no-half –precision full –use-cpu all –listen
终端输出服务启动成功信息,即代表部署完成。
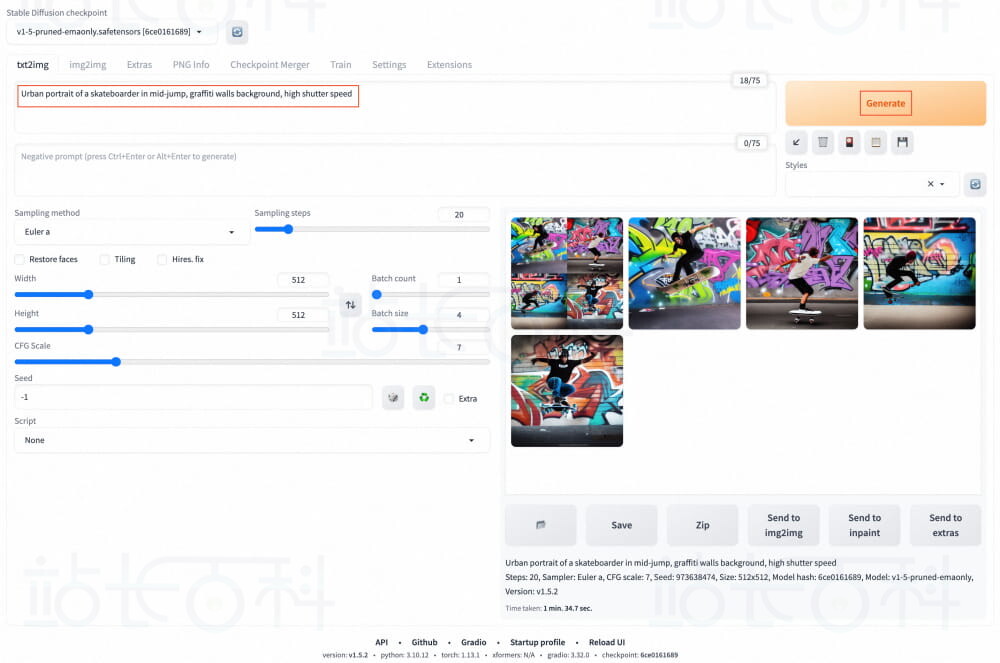
访问绘图界面浏览器打开地址:http://ECS公网IP:7860,进入 WebUI 可视化绘图页面。
生成 AI 图像在提示词(Prompt) 输入框填写英文描述(示例:Urban portrait of a skateboarder in mid-jump, graffiti walls background, high shutter speed),点击Generate即可生成图片;可自定义提示词,实现多样化创意绘图。